Project 1: Low Def High Art
For the first few weeks of the course we will be learning how to draw using text- and number-based ‘instructions’ rather than by directy manipulating the shapes and colors we see on screen. Our subject-matter will be a classical painting of your choosing and our visual repertoire will be intentially limited—both in form and in quantity.
You will in effect be ‘vectorizing’ images by hand at different levels of detail. In the first week we will be using familiar drawing tools such as Illustrator, Sketch, or Figma. In each subsequent week, we will use your initial sketches as raw material for learning a new programmatic syntax for reproducing the same patterns of shape and color.
Step 1: Select an Artwork
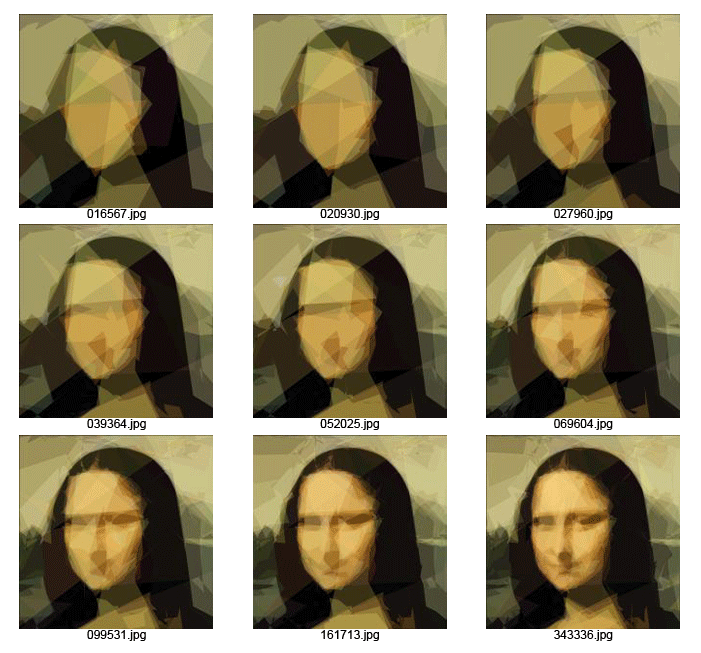
Take a moment to search on the web for a high-resolution copy of a painting that you would be interested in. As you can see from the Mona Lisa example above, interesting results can be achieved by starting with a highly-detailed picture and creating a ‘minimal’ version of it. As a result it’s best to avoid images that use flat, graphic shading or are already inherently geometric.
Some good sources for imagery are:
- The Tate
- The Rijksmuseum or this curated selection from it
- MoMA
- The Louvre
Once you have found your image, create a new Illustrator document and paste it in.
Step 2: Set up Layers
Lock the layer you added the image to and create a new, unlocked layer on top of it. This is where you will be drawing your minimal interpretation of the source image. This will allow you to use the original image as a source of colors and a guide for positioning shapes in your minimal interpretation of it. Toggling visiblity of the original image will also let you take a quick look at your results.
Step 3: Reinterpret the Image with Contraints
Your goal is to explore the ways in which you can create a ‘derivative work’ from your original image using only the most limited set of visual forms. For your first attempt, your constraints are:
- You may only draw rectangles and circles (no lines, no paths, no polygons, no ellipses)
- You may only draw eight shapes total
- The shapes can use any color for their fill but cannot have a stroke/outline color
This may seem extremely sparse (and it is!), but there is still a wealth of decisions to be made in terms of which elements of the image to render in detail and which to abstract away.
Next Steps
Now that you’ve gotten a sense of what’s possible with just a handful of shapes, you can explore the possibilities that open up when you have more and more of them to work with. For next week you will create a total of four variations using a different number of shapes in each:
- 8 shapes
- 16 shapes
- 32 shapes
- 64 shapes
You may choose to have these different versions be additive where you simply layer additional shapes atop the lower-resolution version. However, I encourage you to start each one from scratch, and in particular to take different approaches at the different detail levels. For instance, one might make extensive use of transparency and layering while another might be more of a mosaic, using the shapes as proxy ‘pixels’ in a grid.
Things to try
- Use the eyedropper tool to grab colors from the original image
- Allow your shapes to overlap one another
- Lower the opacity of some of your shapes to create textures
- Make the most of the background-color and negative space
- Experiment with different blend modes in the transparency palette
See the ‘Assignment’ section of the Week 1 shedule for details on how to submit your final images.
Drawing with CSS
Now that you have four compositions made entirely out of rectangles and circles, take a first step into programmatic drawing by ‘translating’ those shapes into HTML and CSS. Start by remixing this Glitch project:
- Click the Remix to Edit button to make a copy of this Glitch project.
- Next, click Edit Fullscreen; this will force the project to open in its own window where you can save your work. You must do this in order to have a copy of your changes to share back with me.
In the project you’ll find four folders (named 8, 16, 32, and 64) each containing a pair of files:
index.htmlcreates the appropriate number of elements, each of which can either have a class of"box"(to create a rectangle) or"dot"(to create a circle)stylesheet.cssis where you can position, color, and composite each of thedivs whose shapes you specified in the HTML file
Each shape in the HTML file is assigned a unique id which will allow you to assign CSS rules to it in the stylesheet using an ID selector. The CSS file already has the correct number of empty stanzas corresponding to the shapes, each of which looks like:
#shape-27{
  /* your rules go here */
}
For each shape, choose whether it is a rectangle or circle by setting its class in the HTML, then edit the CSS to set its
- Position (using
top,left,width, andheight) - Color (using
backgroundandopacity) - Rotation (using
transform)
Be sure to use each of the different ways of specifying these quantities at least once:
- Colors
#43for#8092ff-style ‘hex colors’rgba()colors with red, green, and blue in the range 0–255 and the opacity as an ‘alpha’ value between0.0and1.0hsl()colors specified as a combination of hue (0–360), saturation (0%–100%), and lightness (0%–100%)- named colors like
tomato,darkskyblue, orthistle
- Dimensions
- pixel values like
124px - percentages of the containing element like
20% - proportions of the current window width (
100vw) or window height (50vh)
- pixel values like
- Transforms
- rotation is enough for this week, but do try different units such as
transform: rotate(90deg),transform: rotate(-1.5turn)and so forth
- rotation is enough for this week, but do try different units such as
- Layering
- Note that you can move one element on top of another by moving it to the next line of the HTML file—as with layers of paint, each new element is placed on top of the previous ones
- Setting the
opacityproperty to a value between0.0and1.0will make it semi-transparent and the elements ‘below’ it will show through
Tips and Tricks
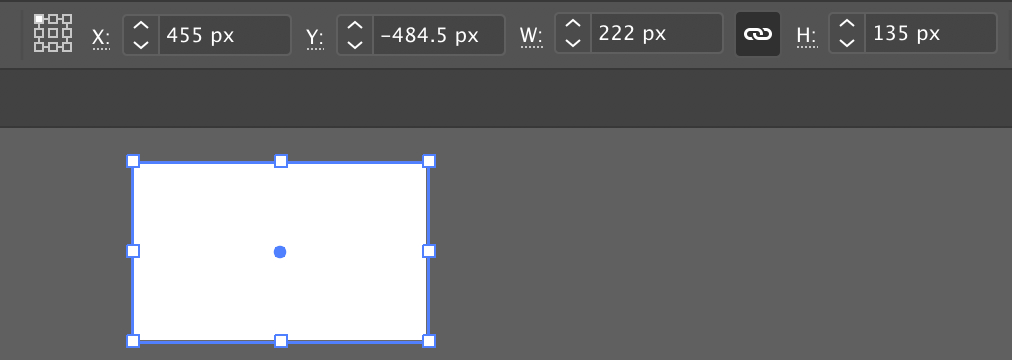
Once you start translating your Illustrator compositions in earnest, you may find it helpful to copy and paste the values in its text fields directly. For instance, you can easily access the dimensions of a shape by selecting it and then looking in the Transform palette (or toolbar) for its x/y/w/h values.
Note that the x/y position refers to the corner of the shape that’s selected in the icon in the top left with the 9 tiny squares.
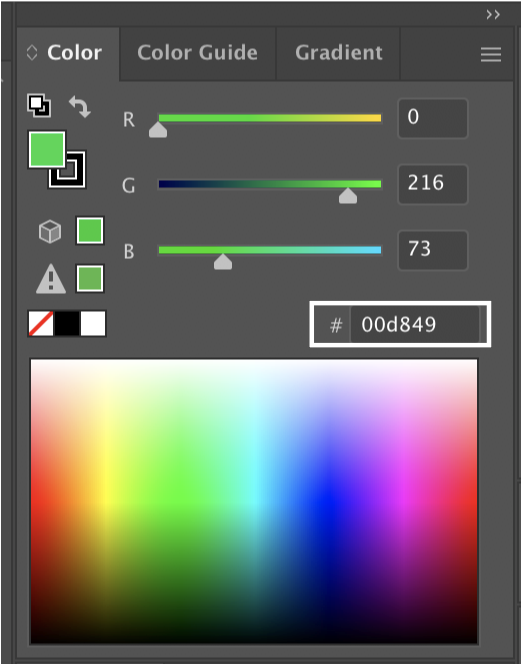
Likewise, you can grab a color as a single ‘hex code’ string from the bottom right of the color palette then paste it into your css with a # at the beginning:
background: #00d849;
While working on a particular drawing in Glitch, click on the Change URL button in the upper right and set it to the folder you’re currently editing. Make sure you type a slash at the end of the URL so it knows you’re referring to a folder.
For instance, while you’re working on the 8-shape variant, set your URL to:
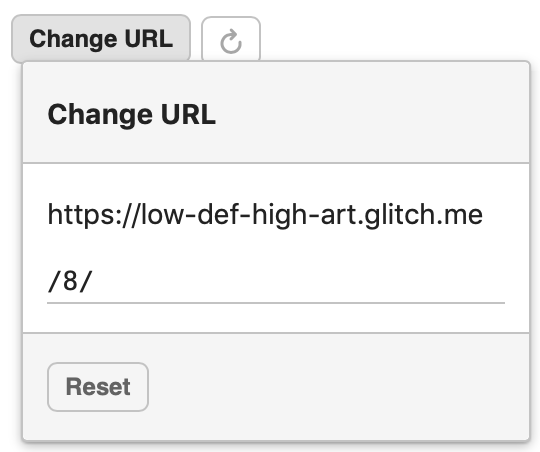
This way the preview pane on the right will refresh itself every time you edit the html rather than jumping back to the table of contents page.
See the ‘Assignment’ section of the Week 2 shedule for details on how to submit your final images.
Drawing with JavaScript
By converting your vector drawings into CSS you’ve already done most of the grunt-work of translating a set of shapes into pure numbers: coordinates, sizes, orientations, and colors. In this next step you’ll be able to reuse many of these numbers, but format them differently to draw with code rather than data.
Start by opening up this P5 Editor project and selecting Duplicate from the File drop-down menu in the editor. The starter code defines four custom functions for you to fill in with your four interpretations of your source artwork. Their names are draw8, draw16, draw32, and draw64 indicating how many shapes to use in each.
For this phase of the project you should limit yourself to drawing with the following functions:
- createCanvas – to set the canvas size
- fill – to pick colors
- rect – to draw rectangles based on their upper-left corners
- circle – to draw circles based on their center points
- the custom
drawBoxfunction that is demonstrated here- You should probably use this instead of
rectsincedrawBoxallows you to rotate the rectangle whereasrectonly draws perfectly horizontal and vertical edges
- You should probably use this instead of
The setup() function at the bottom of the file accomplishes two things:
- It sets the size of your drawing surface by calling
createCanvas - It picks which of your variations to draw to the canvas the next time you click the editor’s Play button
By default the setup function ends with lines like:
draw8()
// draw16()
// draw32()
// draw64()
As you work, you’ll want to uncomment other lines to switch to other numbers of shapes. Be sure to only uncomment one of these at a time or else they’ll be layered on top of one another.
See the ‘Assignment’ section of the Week 3 shedule for details on how to submit your final sketch.